Forum Index > Player Guides > Newbie's Guide to Getting Started
Page 1
1, 2
Go to Page:
Author
Thread Post
Bunne
Level 70
Fancy Pants
Joined: 8/2/2018
Threads: 40
Posts: 862
Posted: 8/6/2018 at 3:52 AM
Post #1
**THIS THREAD CONTAINS SPOILERS! **
These are the tools/links I used most while figuring things out. (And there are some things I wish I had known beforehand). I've tried to narrow down just the basics here, and have linked more comprehensive guides if you'd like an in depth look.
Contents: click or scroll down
This Post: The Basics (things you should know when starting out)
2nd Post: Max Stat Pets, Breeding, and Nurturing
3rd Post: Viridian Meadows Need to Know
4th Post: Umbra Forest Need to Know
5th Post: Astryl's Vale Need to Know
6th Post: Lost Grove Enemies
7th Post: Festival Need to Know
9th Post: LG Crash Course to the Caves - For Easter Event
So you finished the tutorial, now what?
- Decide on a battle party and get more pets
- Expand your Battle Party ASAP
- Explore Viridian Meadows, complete tasks & Level up battle party
- Complete Missions and Quests
- Purchase extra tabs for your Stable and Equipment
- Participate in Raid battles
Decide on a Battle Party
This is important to do first!! You want to level up pets that will be useful to you from the start. I ended up leveling the pets I had, and found out later that half of them weren't the best options for a battle party.
**TIP: You may be tempted to buy already leveled pets, BUT you won't be able to use them in battle! See your avatar's level under your name at the top? You can't explore with pets that are a higher level than you. You can use higher leveled pets for missions though.
There are a LOT of things to consider when choosing a battle party. You should ALWAYS pay attention to each pet's Emphasized Statistics. Take a look at your pet's stats, which ones are the highest? Those are the emphasized stats and will tell you what kind of battle pet they should be. For example:
As you can see in the blue box, this pet has better Magical stats, so you should attune them to a Magical Element. In the Purple box, you can see that Intelligence has the highest base stat of 33, so that is the pet's emphasized stat (this will be handy for missions later).
The Basics:
- Magical Attack Elements: Fire, Light, Shadow (Intelligence linked)
- Physical Attack Elements: Air, Earth, Water (Strength linked)
- Tank Build: always your first slot pet, Earth or Shadow (can take a lot of damage)
- Fighters/Cannons: Air or Fire are the best
- Healers: Light (best choice!)
- Buffers: Water (best used at higher levels and in 3 pet parties)
Proficiency Points:
Earned at levels: 30, 60, 65, 70, 75
Strength: Increases Physical Damage and Mitigation (ability to absorb damage from enemy)
Intelligence: Increases Magical Damage and Mitigation
Dexterity: Increases Critical Hit chance and Accuracy
Agility: Increases Physical AND Magical Mitigation, Increases Avoidance Chance and Quickness rating (Pet's speed)
For a comprehensive guide on Battle Parties: click here.
Your First Battle Party
A great battle party to start with is the "Mixed Build", which includes:
1st Slot: Tank = Earth or Shadow --> +2 health +1 Strength/Intelligence
2nd Slot: Fighter = Air Cannon --> +2 Strength +1 Dexterity
3rd Slot: Healer = Light --> +3 Intelligence
So for your first pet, use your starter pet and attune it to Earth if it's Physical Damage stat is better, or Shadow if it's Magical Damage stat is better. If they are the same, then you can pick either element. Then spend your 1 Proficiency point on Health. Your pet will get additional proficiency points at levels 30, 60, 70, and 75. As soon as you earn them, use them to boost your stats!
As soon as you are able, buy a 2nd Pet slot from the Sylesti Plaza. This is the very first thing you should spend your gold on! Having a second pet will make battling much much easier! It is hard to make money when you first start out, so don't spend it on a bunch of pets like I did (then have to explore a lot to make it back). Once you have the slot, get a pet that has a higher Physical Attack stat and attune it to Air. Then spend your 1 Proficiency point on Strength.
You won't be able to get the third pet slot until you finish Viridian Meadows and move into the Umbra Forest. As soon as you are able, buy the 3rd pet slot from the Plaza. Get a pet that has a higher Magical Attack stat and attune it to Light. Then spend your 1 Proficiency point on Intelligence.
For a Guide to Making Gold: click here.
Gear for your party
For every 5 levels your pets gain, you can equip higher level gear to your them. Be sure to upgrade your pet's gear "on the 0's & 5's" to get the most boost to your stats. There are 2 things to consider when choosing gear:
1. Strength vs Intelligence: match these to your pet's abilities.
2. Dexterity vs Agility: Dexterity is good for attackers, and agility is good for tanks
Gear that offers the same boost to all 4 stats aren't very helpful, but can be used until you get better gear. You don't want to boost strength if you have an intelligence pet, as those are wasted potential boosts. When first starting out, I say match up your gear according to the Strength vs Intelligence of your pet, and only pay attention to Dexterity vs Agility when you have lots of gear to choose from.
Battle Strategies
Here are some helpful tips to restore health when battling tough enemies:
1. Use your pet's ability "Mend" whenever your health drops below 75%. You can only use this ability once every 25 turns.
2. Use potions to restore your pet's health. You can only use a potion once every 5 turns, so plan accordingly.
3. Switch your pet positions. The pet in the middle (or first slot) will take the most damage. If that pet's health is getting low, switch positions with a pet that has higher health. Keep switching around and healing to keep your pets alive. There is no cool down for switching positions, but you cannot use a potion and switch positions in the same turn. You also cannot switch a stunned pet.
4. To heal between battles: use potions from your inventory to heal your pets once you are out of battle. Some potions can only be used from your inventory, so use them up when possible.
Getting Extra Pets
When you start out, you have your starter pet (the one you designed) and the pet you were forced to catch in the tutorial. Your next steps should be getting pets to fill your battle party with, and pets that will be good for Missions. Where do you find them?
Forum Giveaways/Sales: Check the Giveaways and Pet Sales forums for cheap or free pets. You can click on any User's name, then look at their Stables (look for sales tabs) and Hatchery. Look for a gold coin on the pet, that will show you it is for sale (I've highlighted them in green):
**TIP: Thread titles cannot be edited at this time. This will hopefully be added whenever the forums are revamped. Title your threads accordingly!
Pet Search Feature: Use the Pet Search to find a list of all the pets that are for sale on the site. You can specify the level, and select "Yes" in the For Sale box. You can also change the max price to say 15,000g so you won't see any expensive pets you can't afford yet. In the Search Results box, you can opt to show their Stats by clicking the blue button (which is helpful when looking for Mission pets).
Finding Eggs in Explore: If you are lucky, you will find eggs while you are exploring. These will automatically be added to your hatchery. You won't be able to use them to Battle/Explore until they are Adolescents:
Eggling = 0-3 days old
Hatchling = 3-9 days old
Adolescent = 9-27 days old (can be moved into your stable now)
Adult = over 27 days old (able to breed now)
Catching Pets in Explore: I don't recommend doing this until later in the game. Traps are unreliable and expensive when you are first starting out. If you come across a wild pet that you JUST NEED, here are some tips:
- You must have a trap in your inventory before the battle. You cannot buy a trap while you are in a battle.
- Only Master Traps are tradeable/sellable to other players. These are expensive and are best used to catch Legendary/Mythical pets and rare themed pets (Ferrikkis and Nephinis from the festival zone).
- Weakened pets may have a higher catch rate. Attack the wild pet to weaken it's health, but be careful not to beat it first! Once it has low health, use a Net on it, then select a non-attack move (you can't catch a pet that has been defeated). The net may or may not fail, they have a tendency to break often. Master Traps have a 100% catch rate, and the pet doesn't need to be weakened first (and you don't want to accidentally kill it by attacking first).
Generate a Pet: You may find Pet Essences as prizes while exploring or from prize bags. You can use these to create pets, although you may be better off selling them until you get the hang of the game. For a guide to Pet Essences: click here.
Missions & Quests
Quests:
As you unlock areas within a Town, different Quests will pop up. Be sure to check for new ones periodically. They usually require exploring a certain part of the town and finding items or battling certain monsters. Rewards usually include some gold, an item, and/or Faction points (increase your friendship level with the town).
Missions
In each Towns Barracks, you will find available missions. The missions change every hour, so if you see one you want to do, start it while you can! You can do 2 Missions at a time, unless you buy extra slots from the Plaza. Rewards usually include some gold, experience, a Mission Satchel, and/or Faction points (increase your friendship level with the town). Mission Satchels drop lots of restore potions, which will be very useful during Boss Battles!
Each Mission will require a pet with a minimum level and Emphasized Stat (the stat with the highest base number). Once you send a pet on a Mission, they are unavailable to do anything else until they have completed it. You can cancel the mission if you really need the pet back before its over. To keep your battle party free, you should buy Mission pets. Send these Mission pets off to work while you explore and battle with your party.
**TIP: When you are ready to sign off for the night, you can send your Battle Party pets off to do Missions to gain experience while you sleep. BUT you want to keep your battle party pets at or near the same level. If one of your party is higher level than the others, the monsters you encounter will match their level to your highest level pet. One or two levels shouldnt make too much difference though.
**TIP: For the Very Hard Missions (at the bottom of the list), you have to reach a certain reputation (3000/9000) with the town before you can perform them. You can do all other Missions right away though.
**TIP: Pets with at least 700 in their mission stat have a higher success rate. Use gear and proficiency points to get your pet's stat over 700 if possible.
To start, you will want one pet for each of the following emphasized stats (total of 5 pets). If a pet has the same highest stat numbers for 2 characteristics, choose one to focus on.
Health --> Attune to any --> all Proficiency points to Health (harder to identify, see below)
Strength --> Attune to Air, Earth, or Water --> all points to Strength
Intelligence --> Attune to Fire, Light, or Shadow --> all points to Intelligence
Dexterity --> Attune to any --> all points to Dexterity
Agility --> Attune to any --> all points to Agility
A great time to catch or buy mission pets is during or after a Festival. Players will catch Themed pets in festival zones that can be anywhere from level 25 - 70. Some themes will sell for pretty cheap or a "trap price" of around 5k - 10k.
Health Baselines: The health needs to be above the baseline for that Species to be considered emphasized. This is not always obvious: check the pets health against the baseline below. For quick reference, any species with health over 300 has emphasized health.
For a comprehensive Guide on Mission pets: click here.
Buying extra tabs/spaces
Inventory Equipment:
As you explore, you will get lots of equipment drops. Eventually, you will have loads of gear left over, which can be a nice source of gold! Use any extra gear to equip your Mission pets, as this may help their success rate. Then, I recommend selling most of the lower level gear, especially the uncommon and Rare gear. Simply right-click on the item to move it to/from the sell area in your inventory. (You can also try to sell it in the Trade Broker, but it might take a while and will go back in your inventory if it doesn't sell). DON'T auto sell Legendary or Epic gear: you should use these on your pets! If you end up with extras of these, it may be worth selling them via Trade Broker.
For a comprehensive Guide on gear: click here.
Once you have some extra gold, it is a good idea to purchase an extra tab for your Equipment. The extra space will come in handy when battling, so you don't have to keep stopping to auto-sell your extra stuff. I've lost some equipment drops due to my inventory being full! (There will be a message at the end of your battle log saying you had to leave an item behind.)
Stables:
Each player starts with 25 stalls. This may seem like a lot, but they do fill up fast! When a pet reaches adulthood, it automatically transfers from your Hatchery to your Stable. If you don't have a stall open, the pet will be released automatically! Don't let this happen to you, and buy an extra tab, mkay?
Each stable can have 8 tabs and cost 500 diamonds, but are usually cheaper during diamond sales/festivals. When you buy a stable, you only get the first tab included, you must buy the rest.
Each tab holds 25 pets.
- 1st tab = free when you buy the stable
- 2nd tab = 20k
- 3rd tab = 60k
- 4th tab = 120k
- 5th tab = 240k
- 6th - 8th tab = 480k each
If you click on the "View Logs" button in your stable, it will show you how much you spent on food for your pets, and your stable/tab purchases.
You can reorder your stables! Click the "View Stable List" under your picture on the stables page, then use the arrows to reorder.
Hire a Stablehand:
Hiring a stable hand will keep your pets fed, and usually at a discount. This means you don't have to click the "Feed pets" button everyday. I recommend doing the 2 week contract, as the longer contracts require diamonds as payment. If you don't have many pets, it might not be cheaper. For example, here are some daily feeding costs:
You spent 900 Gold feeding 90 Pets.
You spent 1690 Gold feeding 169 Pets.
Your Stablehand spent 1557 Gold feeding 176 Pets.
Your Stablehand spent 2115 Gold feeding 708 Pets.
It seems that if you have over 150 pets, hiring a stablehand should save you money. If you don't play often, you might not want a stable hand and can save the gold instead. If you want to battle or breed pets, they must be fed.
Raid Battles
Keep an eye out for a flashing banner at the top, like this one (in orange):
You will likely see them every 3 hours, starting at midnight. Go to the location listed and battle until the event is over. The events only last for a few minutes, so RUN when you see the banner. This is a great way to get experience in a location you normally wouldn't, and you can get Event Satchels that contain gold or items. Monsters will match your highest level pet, no matter the location of the raid. Sometimes you will see a Boss at the end of the raid, so be ready for that!
Edited By Bunne on 4/12/2020 at 1:51 AM.
Bunne
Level 70
Fancy Pants
Joined: 8/2/2018
Threads: 40
Posts: 862
Posted: 8/6/2018 at 3:52 AM
Post #2
Top | Breeding | Viridian Meadows | Umbra Forest | Astryl's Vale | LG Enemies | Festivals
Max Stat and Super Stat Pets
Once you have played the game a while and have expanded your inventory/stables, it may be a good time to look at Max Stat pets. What is a Max Stat pet?
Notice that the health is at 2000, and Strength/Intelligence/Dexterity/Agility are at 100. These pets can only be created through breeding. Most wild caught pets will have base stats of 10-15. You must breed pets to increase their stats:
- Use scale shop potions on egglings when they are ready to hatch = 5 pt increase on specific stat
- Help Eggling hatch = 20 health point increase
- Use Prismatic Philters on egglings ready to hatch = 200 health, +10 point increase for all 4 stats, +10 mana
- Use Mana Philters on egglings ready to hatch = +20 mana increase
Max stat pets tend to be expensive, especially when you are new and you don't have much gold. They can run anywhere from 150k and up, depending on pet rarity.
You may be asking, why do I want one of these? Max stat pets make battling easier! With higher stats, you will beat your enemies faster with less turns taken. When you find yourself with an extra 200k gold, that would be a good time to buy one.
There are also Super Stat pets. These are pets that come from the Lost Grove region that have extra stat points when caught. Then they are bred using potions/etc until they reach max stat. The extra points they had when caught make them Super Stat:
Notice that all purple stats are (100 + 30) or so? The added stats are what make these pet Super Max. These will be even better battlers. However, their breeding is more tricky, so they cost a lot more than Max stat pets. Prismatic philters can only get a pet to max stat. In order to reach super stat, the extra points have to be bred in. Pets with extra stats can only be caught in the Lost Grove. The more rare the pet, the higher the extra stats.
So now that you may want to buy a max/super stat pet, where do you find them?
- Pet Sales Threads: for the Max/Super Stat master directory click here
- Advanced Search: you can search by species and/or theme. Just click through the results and look at their stats. This can be tedious as you may look through hundreds of low stat pets before you find a max stat.
- Zone chat box: sometimes you will see users mention they have max stats for sale. I've bought a couple this way by happenstance. This is least reliable, but you can ask if anyone has any for sale.
Note: After I bought my first super maxed pets, I noticed their gold stat %s were actually dropping in numbers as I leveled them! I was concerned that my pets were becoming weaker somehow. Rest assured, this is not the case! I got a great explanation from Krin and will explain it below if you'd like more information. Feel free to skip this and go to the Breeding section if you don't want a detailed explanation. ^.^
As you level your pet, you will notice the gold colored stat %s decrease. As your pet increases in level, its purple stats will increase and are also affected by equipment and proficiency points. If the gold %s didn't decrease as you level, this would increase your pets power, making them too powerful and unbeatable in higher levels. Here is an example:
Level 0 Pet --> Agility:100, Avoidance Chance: 50%
Same pet at level 60 --> Agility: 350, Avoidance Chance: 16%
As you can see, the pet at level 0 has a 50% chance at avoiding an attack. If the %s didn't adjust as the pet was leveled, then its stats at level 60 would be Agility: 350, Avoidance Chance: 175%. Meaning the pet would avoid getting attacked every single turn. While this would be nice, it creates a very unbalanced battle. This is the reason why the %s are changed as your pet levels. If you do the math, you will see that your pet's abilities are still just as strong, or better depending on equipment/proficiency points:
Level 0 --> 100 x 50% = 50
Level 60 --> 350 x 16% = 56
So don't be concerned if you notice a change in the % stats. It is merely a balanced equation to keep your pet's stats in check.
Breeding Pets
At some point, you will inevitably come across a pet theme that you really love. You may want to do a breeding project to create a 4-visible or 6-visible gene pet. You may even want to create your own Max Stat pets. Here are some things to consider:
- Themed pets are usually worth more than non-themes, which means you may have an easier time selling themed project pets.
- 6 visible gene pets are usually worth more than pets with less genes visible. Themed pets that have Restricted Traits may only be 4 visible at the most. For example, the Twilight Deity Lighira:
These were only able to be created during one Festival, and these pets can only have the Ancestral Deity genes. These genes are only available in 4 certain gene slots, so that is the max amount of visible genes you can have on these guys. For more info on Restricted Festival pets, see the Festivals section.
A great item to own would be the Exceptional Genetic Test Kit. This can only be bought in the Diamonds shop, and each user can only buy 1 (and they are not tradeable). The normal price is 1,500 diamonds, but you can usually find it on sale for 1,000 diamonds during festivals. This test kit gives you unlimited genetic testing for all pets in your possession. If you have this kit, your pets will automatically be tested when you help hatch them in your hatchery (which is a nice bonus!). Once you own it, this guy will just sit in your inventory. Be sure to put it somewhere that you won't accidentally auto-sell it!
To see Hidden and Carried traits, you need to genetic test the pet. Here is an example of a pet's genes:
Starred Name: means the pet is themed. Purple = first gen pet, Blue = offspring (both parents are the named theme, called purebred)
Carried Traits: are in green, and start with "N" (indicates no gene for the first slot)
Visible Traits: are purple or blue
HIdden Traits: are purple, the hidden trait is listed second, always ordered alphabetically
You can see that this pet was tested, as it has the genetic kit icon under the theme name. If this pet was not tested, you would not see the carried/green traits, or the hidden/purple trait (it would show as DD in Gene Two).
When you breed themed pets, unless you breed two pets of the same theme, the pet will lose it's starred name. In other words, it won't be a themed pet anymore. You might hear the phrase "Tagged Pet", this means a Themed pet that is either Exclusive or Tamed (so not an offspring).
Hidden and Carried genes can greatly affect your breeding project. Breeding for each gene is based on the Punnet Square:
Carry x Carry = 25% nothing, 50% carry, 25% Visible (left square)
Carry x Vis = 50% carry, 50% vis (middle square)
Vis x Vis = 100% vis (right square)
Vis x nothing = 100% carry (not pictured)
Carry x nothing = 50% carry, 50% nothing (not pictured)
It is important to figure out what genes you want in your breeding project before you start. The Generator tool is your friend for breeding projects ^.^ Once you have an idea of what you want, these breeding guides are invaluable:
For an excellent guide on 6-vis breeding:click here.
For a helpful guide on stat breeding:click here. Post #5 with the colorful post-it-notes is especially helpful for showing how to breed offspring together with prismatic philters.
For a guide on Restricted Traits:click here.
Nurturing your Hatchery
For every 6 nurtures done on Egglings, they will age faster (by one hour). For every 8 nurtures on Hatchlings, a stat will increase by 1 point (lowest stat gets bonus first) and it ages by +2 maturity. You also earn Scales, 1 for each nurture action you get right (2 scales for nurture boosted pets). You can spend the Scales in the Scale shop for fun items. Different stages require different actions.
Eggling:
warm --> Cool it
cold --> Warm it
restless --> Turn it
dirty--> Clean it
Hatchling:
weak --> work out
bored--> play with it
derpy --> read a book
slow --> race with it
When an Eggling is ready to hatch, it will give you 3 options:
Help break the egg --> Increases health stat
Let the Egg Hatch --> increases random stat
Use selected Philter --> use Prismatic Philters here to boost stats
Eggling = 0-3 days old
Hatchling = 3-9 days old
Adolescent = 9-27 days old (can be moved into your stable now)
Adult = over 27 days old (available to breed now and moved to stable automatically)
Make sure you have room for pets that become adults! If you don't have room in your stable for aging pets, they will be auto-released and you'll have to pay 50 diamonds to get them back.
Check out this Nurturing guide for more info: click here
Link to Nurturing Grounds revamp thread: here, and stat increase info here
Edited By Bunne on 4/7/2020 at 5:38 AM.
Bunne
Level 70
Fancy Pants
Joined: 8/2/2018
Threads: 40
Posts: 862
Posted: 8/6/2018 at 3:52 AM
Post #3
Top | Breeding | Viridian Meadows | Umbra Forest | Astryl's Vale | LG Enemies | Festivals
Viridian Meadows: Things to know
Your First Dungeon
After you conquer the Nightfall Bandit Camp, the Umbra Forest unlocks for you, and the Nightfall Bandit Dungeon appears. You do NOT need to beat the Dungeon before moving on to the forest.
TIP: You will encounter 2 - 3 Level 30 Bosses (at different times) and your Mana will be reset to 0 each time. If your party is not strong enough to beat these bosses, feel free to skip the Dungeon, and come back after you've leveled up some in the Umbra Forest. You will have the chance to battle lesser monsters in between Boss battles: you can use these to restore your Mana and Health.
Dungeons are a different sort of area with different objectives:
- You can only complete the Dungeon once a day. (There will be a countdown timer that ends at midnight?)
- Treasure chests/crates now have the chance to attack you! (see next post for more info)
- Door has a number combo that you need to continue
- Slide Puzzle games
- Weather Runes
- Peddlers
- Choose 1 of 4 chests for your reward: Dusty, Shiny, Sparkling, or Glowing
Info for these sections are summarized from the Dungeon Guide: click here for more info.
Number Combinations Read this before starting!!
As you explore the dungeon, Jinxie will appear with a cryptic message like "X things appear" and that maybe they mean something. Remember them! These numbers will be the combination to the door near the end. Remember or write down the numbers (in the order you see them). If you skip past this, or forget the numbers, you can reset the dungeon after 24 hours has passed. A red "Reset Dungeon" will appear on the page. (You do not need these numbers to continue if you forget them, you will just skip the boss behind the door) Each time you attempt the dungeon, the combination will be different, and numbers can repeat. You can have 888 or 344 or 298 as the combo.
If you enter the right number, you will be taken directly to a level 30 Boss battle! Your Mana will be reset to 0.
Weather Runes
At some point, you will come upon a door that requires you to select a Rune to continue. The trick for this is to check the Site's weather report in the upper right hand corner, next to the clock.
If its Sunny or Clear --> Warm Rune
If its Cloudy --> Cool Rune
If its Windy --> Air Rune
If its Rainy or Snowy --> Wet Rune
If its Stormy --> Shock Rune
If you answer correctly, you will be taken to a battle afterwards, and your Mana will reset to 0. (Non-boss battle)
Slide Puzzles
One 3x3 slide puzzle will appear in each dungeon journey. You will get to see a preview of the complete image, then you have 200 moves to slide the puzzle pieces to solve it. If you don't solve it, you can still continue without any problems.
If you solve the puzzle, your progress skips ahead a little bit and you are taken directly into a battle with a level 30 Boss. Once again, your Mana resets to 0.
If you'd like help with solving slide puzzles in general, click here for an off-site link with tips.
Final Boss Battle: you will encounter one last Boss at the end of the Dungeon. When you beat him, you get to choose 1 of 4 chests as your reward.
Your First Peddler
At some point, you will come across a Peddler (one time per Dungeon journey). He offers you a treasure box in exchange for gold. The box is a gamble: sometimes you get a gold reward that is less than you paid, sometimes you get an item that may or may not be valuable. If you have gold to spare, feel free to take the chance! If you don't, then skip it. You will encounter Peddlers in Umbra Forest too.
For more information, click here for the Peddler Guide.
Edited By Bunne on 6/2/2019 at 3:33 AM.
Bunne
Level 70
Fancy Pants
Joined: 8/2/2018
Threads: 40
Posts: 862
Posted: 8/6/2018 at 3:52 AM
Post #4
Top | Breeding | Viridian Meadows | Umbra Forest | Astryl's Vale | LG Enemies | Festivals
Umbra Forest: Things to Know
You need to level up your Battle Party before going too far in this region. I recommend reaching at least level 30 with your 2 pet party (then you can use a new Proficiency Point to boost their stats). Then buying your 3rd Slot for your Battle Party as soon as possible. I had the HARDEST time with my 2 level 25s, and had to go back to the Meadows to train up.
The Treasure Chests Fight Back!
If you skipped the Dungeon and came to the forest first, this will be new to you. In this Region, not all treasure chests give gold or items. Some will actually attack your pets and drain some of their health! I recommend ignoring them until your party has high enough stats to take a 200-400 point hit without being affected too much. You will level up fast in this region (up to 50-ish), so it shouldn't take long.
Beware the Fairy!
Jinxie makes frequent screen visits in this region. When you encounter an item, she will give you a chance to "Reveal Object" or "Ignore It".
Ignore --> Nothing happens, you move on
Reveal --> Most times you will be taken to a battle. Rarely she will drop an egg on you! (Sometimes the egg gets damaged and lost, then you battle anyways)
However, there is a new fairy: Madeline
Notice how the "Reveal Object" and "Use Healer" buttons are in the same spot for both fairies? One gives you a chance at an egg, the other takes your gold!
Madeline offers to heal your pets for a fee, which can be expensive. This may be handy if you like the convenience of healing all your pets with one click (instead of going to your inventory, etc). HOWEVER, once you get good at exploring, you may accidentally click "Use Healer" and end up paying her fee before you realize what happened! I ended up paying over 2,000g on accident, and my pets were already at 100% health.
Aryth the Boss: Your first major Challenge!
TIP: You should have at least 3 level 50 pets to defeat this Boss! You can try with lower levels, but your chances of winning are lower. Continue exploring the Forest to level up (or go for it and see what happens)..
Aryth and his Mirror Maze will be very difficult to beat! He is a level 45 Boss, and fights with 2 Mirror Images of himself that also attack you! The Trick is to attack the real Aryth and defeat him, then his mirrors will disappear.
But before you even reach him, there is a series of colored rooms that you have to navigate through. Feel free to wander through and track your own progress if you like to choose your own adventure. You will have many monster battles in between rooms, so if you want to keep your journey short, use the Mirror Maze Guide by clicking here. Did I mention some of these battles will be with armies of 10-20 undead?
As you work your way through the rooms, you will come across some strange bottles of liquid.
Some players say it is good to drink them, as some will give you temporary boosts for your battle party. BUT some of them can seriously damage your pets! I avoided them both times I went through the Maze. (Yep, I failed the first time)
Eventually, you finally make it to battle Aryth. As mentioned, he fights with 2 mirror images of himself. Defeat the real one and they all fall. How do you know which is the real one? His position is random: sometimes he is in the middle, sometimes the top or bottom. My first attempt, I just picked one and defeated him. It ended up being a mirror, and I was defeated before the second one fell. The second time around, I attacked each boss one time, and examined how much damage each attack did to each boss. The real boss has the highest health, so he will take the least amount of damage. This can be tricky to figure out, as my pets (maybe yours too) have different attack points (around 400-200-200). Keep this in mind when comparing damages to his health. If math isn't your deal, you can pick one at random (or maybe keep attacking the same position and hope it's the real one this time). If you lose, you WON'T have to go back through the maze, and can come right back to battle him again once your party recovers.
For a great play-by-play Guide to exploring the Spire and beating Aryth, click here. This thread is a SPOILER alert, and has play-by-plays for all towns/regions.
Dungeon of the Forsaken: Harder than the last Dungeon
Make sure you have a strong team, all monsters are level 50 (or higher depending on your level)! If this is your first time in this dungeon, I recommend following the Dungeon Guide: click here. Once you've been through it, this section will be a nice quick reference. :)
Locked Door Puzzle: use pet with high stats (around 400+)
Door won't budge --> Strength
Cannot figured out how to open the door --> Intelligence
Door is locked --> Dexterity
Cannot reach the switch --> Agility
If you open the door, you go to battle with your first Boss (after many minion battles). Your Mana will be reset to 0 when you encounter the boss.
Red Orb Slide Puzzle: can be tricky to figure out, here is a great visual from Flute!
You have unlimited moves to solve it. The trick is getting the sword in a row or column by itself (no orbs/shields in that row or column). I usually randomly click until I get the sword by itself. Once you have that, click on one row or column at a time to see if you can get 3 orbs in one row, 1 orb in another row, and 1 sword alone. Each row can be clicked 3 times before you are back to the original set up. So I click up to 3 times, then move on to another row. Once you find the 3-1-1 set up, you can follow the image above to solve.
Eventually you go to battle with an army of 38 monsters ending with your second Boss. Make sure you use your Mend, change your pet's positions (move the one with the most health to the first slot), and have elixirs ready (Mission satchels give lots of these).
3rd Boss encounter: you will stumble upon them after many battles.
Defeat the Dark Elf bosses in this order: Sorcerer > High Priestess > Assassin > Warlord
Your Mana will be reset to 0 at the start of the battle.
Final Boss, Shade of Vierna & Vierna Da`Sheer:
- Your Mana will be reset to 0 at the start of the battle.
Shade of Vierna
- Leave its minions alone, attack only the shade. Once you defeat it, the real boss shows up.
Vierna Da`Sheer
- Mana Transfusion Atack: Pay attention to when the boss appears. Every 5th (maybe more) turn they take your Mana and turn it into health for themselves. (1 Mana = 40 Health). Use all your Mana on the 5th turn by using a finishing blow. I usually attack 4 times, then use finishing blow on the 5th turn. Keep repeating until they are defeated.
For a comprehensive Guide to the Forsaken Dungeon, click here.
For just the section on beating Vierna Da'Sheer: click here
Edited By Bunne on 8/21/2019 at 7:37 PM.
Bunne
Level 70
Fancy Pants
Joined: 8/2/2018
Threads: 40
Posts: 862
Posted: 8/6/2018 at 3:53 AM
Post #5
Top | Breeding | Viridian Meadows | Umbra Forest | Astryl's Vale | LG Enemies | Festivals
Astryl's Vale Things to Know
Now that you are getting the hang of the game, it is going to change on you!!! The explore format is different, and now enables more freedom to choose your own path. Make sure to explore every square of each level. Can anyone say Mermaid? ;) Check the Sylestia Guidance (in the bottom right corner) for more info when you reach this region.
**TIP: You can now use keyboard hotkeys to explore these regions. However, if you have caps lock on, the keyboard hotkeys won't work. If you notice the hotkeys suddenly aren't working, you probably turned on caps lock accidentally.
Step by Step Walkthrough Guide (contains spoilers): click here.
Arena Tips:
- To work your way up the ranks, you MUST start fighting with pets level 0-25. Now seems like a good time to start training a second Battle Party! Use Philter of Unlearning to lock your team at level 25 (found in Scale shop for 100 scales).
- You do NOT need to complete the Arena to open new zones.
Level 0-25:
Fire Eyes: Difficulty: 1/5
Heat of the Moment = Middle pet blocks
Stonewing: Difficulty: 2/5
Pets marked with Gaze need to block next turn to avoid stun
Kimeira and Katalyst Difficulty: 3/5
- Beat Katalyst first. When he uses Flame Shield, attack Kimeira until the shield is down to 1
- Kimeira: block Essence of Purple and Essence of Sphere on marked pets
- Heal pets when Flame shield is off
Oogar Difficulty: 2/5
Aiming Attack = use Quick Attack to avoid it, don't heal pets during this attack
Malgron the Destroyer Difficulty: 5/5
- Glisten = middle pet blocks
- Gaze marked pets = block to avoid stun?
- Berserk = less than 30% health
- Glisten during Berserk = middle pet block first turn, all pets block 2nd turn (no icon for 2nd turn)
- Use finishing blows when less than 10% health (to allow for blocking up until then)
Level 26-50:
Plaguebringer Difficulty: 2/5
- Once your middle pet (tanker) get 3 Raging Plague icons, change his place with one of your pets that has the most HP.
- Use finishing blow 2-3 turns before your pet gets defeated
Mamosa Difficulty: 1/5
- Rear Up = use quick attack to avoid on middle pet, all pets block next turn to avoid quickness attack
Ran'Tiki Difficulty: 3/5
- Marked pet = block repeatedly, switch positions with high mana pet after
- use Mend when have over 85 Mana to keep blocking ability
- use Finishing blow when he's below 10% to keep blocking ability
Team Sprocket Difficulty: 5/5
- Beat them in this order Zibby -> Znogg -> Zeb.
- Channeling = block with all pets to avoid stun, don't heal when in effect
- Shielded = keep attacking, will transfer some damage to Znogg (don't confuse with Lightning)
- Shield of Lightning = stop attacking Zibby (<40% health) until goes away (switch to Znogg)
- don't use finishing blow when Symbol of Mordeki is in effect
Harpy Sisters Difficulty: 5/5 Guide to beating them
- Attack Nova/Red until around 21-25% health, then switch to Freya
- Attack Freya/Blue until she has absorption shield up (Ice Block), then switch to Nova
- Attack Nova until she puts up Phoenix Flame shield, then switch to Freya
- Don't kill either sister until they are both nearly dead (need to finish both around same time)
- Once Freya is defeated, using Finishing Blow on Nova
- Channeling by Nova/Red = Use Quick attack by middle pet
- Channeling by Freya/Blue = block with all to avoid big attack
- Radiating Heat = move affected pet to middle b/c Nova will try to freeze middle pet next turn
Arena Battle Guide: click here.
The Lost Grove:
Before you attempt the Lost Grove, you should level your party to 65, as the monsters you will encounter will be level 65-68. This means lots of exploring to level up! Don't forget to accept tasks for extra gold while you explore.
Note: While in the Grove, your pet will NOT gain health out of battle (no 30 min recovery here). You must use Grove specific potions/elixirs you find in the Grove or Town Shop to heal (in addition to your pet's abilities).
When you first explore this zone, I HIGHLY recommend using The Lost Grove Walkthrough: click here. I'm making notes here for quick reference.
The Lost Grove is the first permanent zone that features Themed Pets! These are highly desirable, so I recommend trying to catch one. How do you know a pet is themed? The name gives it away:
Wild Sylesti = non theme (Wild Luffox, Wild Lunemara, etc)
Named Sylesti = Themed! (Laughing Stream Luffox, Wandering Willow Lunemara, etc.)
Boss Minions = not catchable and usually have one word names like Gloom or Luna. They will not have the genus in the name (so no Ferrikki or Qitari in the name). They usually show up with their boss.
If you see a purple message in your battle log that says "[Pet name] picked up a scent to the South!", run the zone to find an egg nest spawn! The direction will change depending on where you are and where the egg is. The nest can take up to 5 minutes to show up, so just keep checking. These nest spawns are different from festival zones, in that the nests have their own spawn points that are different from chests spawns. The nest spawns are usually near the Elite and Boss spawns, so check those areas very well.
For a list of Lost Grove themes: Forest pets here and Cave pets here.
Rank Your Pet's Abilities
Noticed the gold stars next to your pet's abilities? You can rank up their power by defeating enemies only in the Lost Grove. Hover over the abilites on your pet's page to see how they change with each rank up. Ranks are increased with each battle and when you use that specific ability. From what I've observed, here are the ranking rates during normal play with constant battling (in stage 6):
Rank 1: around 50 enemies defeated (8.5 minutes) per 1% rank up (Crazed Druid = +0.06%)
Rank 2: around 105 enemies defeated (18 mins) per 1% rank up (Crazed Druid = +0.03%)
Rank 3: around 200 enemies defeated (35 mins) per 1% rank up (Crazed Druid = +0.04%)
Rank 4: ranking stops after you reach 4 stars (for now)
I checked the ranking rates for Stage 7, they appear to be twice as fast. Not sure if this was changed for all stages when the caves opened?
Normal play = exploring with 3 pets, no elites/boss battles, using better abilites when able, healing/mending when needed. Your timing may be different, as everyone has their own speed of battling and different party set ups. Here are the pets I used to gather this info, all max stat or higher, measuring ability 1 rates:
Rank 1: 2 level 70s with rank 4 abilities; 1 level 50 rank 1
Rank 2: 2 level 70s with rank 4 abilities; 1 level 59, super stat, rank 2
Rank 3: all level 70s with rank 3 abilities, super stats
Ability 1 will rank up faster because it is used more often than Abilities 2-4. I've noticed my ability 2 is around 10% behind ability 1 when it hits rank 2. Then it gets to be around 20% behind when ability 1 hits rank 3. Abilities 3-4 usually use more mana and have a higher cooldown, which means they rank even slower. You'll find yourself spamming your ability 4 when your other abilities have maxed out. Keep at it, the rewards are worth the work!
Rank 4 Ability Comparisons
Buffs that boost your pet's stats are highlighted in blue.
Air: attacker, single target
#1 - 250% Damage x1; chance of Bleeding x4 turns (100% damage)
#2 - 400% Damage x1; Bleeding x6 turns (200% damage)
#3 - 300% Damage x1; Frenzy x4 turns (40% increase crit chance/quick); Dazed x4 turns (doubles bleeding damage)
#4 - 750% damage x1, plus 9% damage for every 1% health enemy is missing
Fire: attacker, multiple targets
#1 - 200% damage x2; chance of Burning x3 turns (100% damage)
#2 - 350% damage to all; Combusting x3 turns (25%, then 50%, then 100%, then 200% damage)
#3 - 300% damage x1; Engulfed x4 turns (30% increase damage), Burning x4 turns (100% damage)
#4 - 300% damage to all; Inferno x6 turns (450% damage split between all enemies)
Earth: defensive, tank
#1 - 100% damage x1; 50% chance of Leeching Vines x3 turns (100% damage with health restore, enemy debuff)
#2 - Thorncoat x3 turns (200% damage to attackers, 30% increase mitigation, immune to crits and certain attacks)
#3 - 200% damage x1; Taunted x4 turns
#4 - Valor x6 turns (absorbs 350% damage), Taunted x6 turns on all enemies
Shadow: defensive, tank
#1 - 200% damage x1; 50% chance of Siphoned x3 turns (50% damage, restores health for 100% of that)
#2 - 350% damage x1, restores health for 150% of that
#3 - 300% damage to all; Taunted x3 turns
#4 - Augmented x4 turns (increased healing by 75%), Drained x6 turns (enemy debuff, 25% damage, restores health for 100% of that)
Water: support, buffer
#1 - 200% damage x1; 50% chance of Frost x3 turns (absorbs 100% damage)
#2 - Ice Barrier x5 turns (absorbs 300% damage, restores health for 50% of that, immune to crits and certain attacks)
#3 - 250% damage to all; Surge on all pets x3 turns (20% damage increase, 30% quickness increase)
#4 - Ice Sphere on all pets x8 turns (absorbs 600% damage split between all pets, restores health for 50% of that, immune to crits and certain attacks)
Light: support, healer
#1 - 150% damage x1, restores health for 50% of that to all pets
#2 - 200% damage to all;, restores health for 75% of that to all pets
#3 - Restores health equal to 300% damage; Restoration x3 turns (restores health = 50% damage)
#4 - Divine Balance x3 turns on all pets (restores health = 200% damage, shares health points between all pets)
Edited By Bunne on 7/10/2019 at 2:49 AM.
Bunne
Level 70
Fancy Pants
Joined: 8/2/2018
Threads: 40
Posts: 862
Posted: 8/6/2018 at 3:53 AM
Post #6
Top | Breeding | Viridian Meadows | Umbra Forest | Astryl's Vale | LG Enemies | Festivals
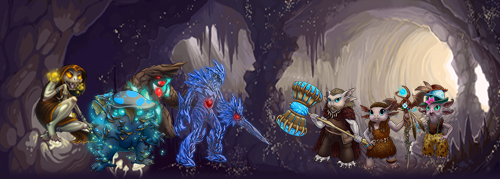
Lost Groves Enemies and Stages
If you prefer video guides, Kattya has made some great ones: here
NightFall enemies:
Kill Order: Battlemage > Brigand > Mender
Battlemage: attack first, hit hard when shield first goes up. If you don't defeat them when the shield is up, your party will take damage when you hit them. But if you don't defeat them on or before the 4th turn, one of your pets will be afflicted with Singe, which can do up to 1000 damage per turn for 5 turns (or until the battle is over).
Brigand: Block at 100 Mana to avoid stun (if you are high level, this isn't needed). These guys like to share their health with others, and can be a pain when in groups.
Mender: Target last due to healing ability
Stage 1-6 Elites:
Elites will respawn every 4-6 hours. You may also encounter "roving" elites, meaning they can pop up anywhere in the zone randomly (not very often though).
Crazed Druid:
nothing noteworthy, exclusive for Enchanted Cloth drops
Ancient Ent:
- Wrathful Fury = Block with all to avoid Stun
- Fury (permabuff) = ranks up as battle progresses, up damage 4% per rank
- 100 Mana = Bark Skin --> healing from damage moves won't work until over
Nightfall Captain:
- 100 Mana = use Quick attack, then Block all pets for 3 turns
- Exclusive for Tempered Steel drops
Stage 2-6 Bosses:
Sometimes when you defeat an elite, it will trigger their boss to show up. You'll see a message pop up in purple, saying "Your presence has been noticed..." This is random, and can take many battles before you see the boss.
Oakstout the Gnarled: triggered by defeating Ancient Ents
- defeat spritelings first
- Enraged Fury = Block with all to avoid
- Fury and Bark Skin similar to Ancient Ent
Malfarian the Augur: triggered by defeating Crazed Druids
- defeat rikkis first
- similar to Crazed Druid
Eleane the Duelist triggered by defeating Nightfall Captains
- defeat her minions first
- 100 Mana = use quick attack (may not work), then block with all for next 3 turns
- similar to Nightfall Captains, but much harder
- If you are using an Earth Tank: use attack 3 at 90 mana to taunt Eleane, then use thorncoat on next turn. You can then attack Eleane the next 3 turns and not have to block. She will likely avoid the attacks, but you won't waste mana by blocking.
Lost Grove Elites and Bosses Guide: click here
Stage 5: The Behemoth
Once you reach stage 5, you will see a huge boss beast at the bottom of the zone blocking the rock opening. Here are some things you should consider before beating the Behemoth:
- All enemies increase from level 65-68 to 70-73 after you beat the Behemoth. This means Eleane will be near impossible to beat. Unless your party is level 70 with rank 4 abilities and enhanced Vinethorn equipment, you WILL need many potions to beat her.
- Because the enemy levels increase, battles take longer/more turns, so "farming" for the items needed to construct buildings will take longer. It is recommended to have most of your building supplies before beating the behemoth. Eleane can drop Damaged Manikins and Peerless Rapiers, so if you can't beat her, you are missing out on those drops.
Stage 7: The Caves
The area below the Village is being dubbed "The Deep Caves". Enemies always show up in triplicate in this area of the caves.
Tori has made a wonderful map, Tori's Cave Map link.
- entrances in the deep caves will shift occasionally, opening/closing access to some rooms. If you see this message as you leave the village for the deep caves, your map most likely just shifted:
The grinding of stone echoes throughout the tunnel ahead.
Stoneweave Gear swap thread: click here.
Mycoid Enemies:
Kill order: Mystic > Thrasher > Plaguespreader
Mystic: Produces spores that heal all enemies, saps your pets mana
Thrasher: Enraged and healing ability, hit hard on one pet
Plaguespreader: stacks poison on your pets that deals damage per turn, share health
Elites:
Ancient Crystalline Golem: combo of shard attacks is lethal
- attacks your middle pet only
- Piercing shards = move affected pet right away to keep away from middle slot
- 100 Mana = ensure middle pet doesn't have piercing shards (too late to move pet to avoid at this point)
*If you have a Light pet with Divine Balance (attack #4), you can use this when Golem is at 100 mana to avoid the shard combo, and you won't have to switch pets! If you prefer this method, just make sure you have enough mana and pay attention to the cooldown (10 turns) for next round of shards.
Lost Disciple:
- Channeling = hit hard to make this disappear before the 9 turns is over or insta-death
- Psionic Barrier = don't attack, absorbs damage and attacks pet (if you do attack, this can disappear in 2 turns if your pets can take the hit)
- 100 mana = stuns one of your pets for 5 turns, block with all to avoid if needed
Ancient Cave Creature:
- Ravenous Fury = stacks as battle progresses
- 95-100 Mana = block with all to avoid Infection
Bosses:
*hint from Krin: Demora drops things to help you beat Dia. Both of these bosses drop things to help you beat Kowlla, who is intended to be very difficult.
Demora Crystalheart:
triggered by Ancient Crystalline Golems, 180k health, golems = 100k health
- 100 Mana (Demora) = block with all to avoid stun x3 turns (very important!)
- attack golems hard when they have Empowered, watch for shards (same as solo ones)
- defeat one golem, leave the 2nd with really low health. Attack Boss until she uses Spellbinding to bring golems back. Might have a long cool down if you keep one golem around? When respawned, kill the near dead one, attack the other one until low health. Then attack Demora until she respawns golems.
- Crystal Barrier - attack to remove quickly
- 2nd round of golems - Attack Demora to defeat, then defeat golems
If your pets can take the hit, you can defeat Demora first while leaving the golems alone.
How long does it takes her to respawn golems if you defeat them right away?
Dia, Du'vhal's Hand:
triggered by Lost Disciples, 240k health, minions = 60k health
- need to have 2 fighters to overcome her healing abilities and defeat minions quickly
- she will summon minions, attack them when they appear and defeat within 9 turns or she gains Sacrifical Power, permanent rank that increases.
- Attack minions until their health is around 1/2-2/3 full, then use decimate for optimal attack. Dia acts first and sacrifices them on the last turn of buff, so don't wait until then. Try to defeat the minions within a few turns of each other, Dia will sacrifice them early (sometimes with 3 turns left).
- Summoning = block with your 3rd pet, energy cage will hit them next turn = stunned 5 turns
- 100 Mana = Insidious Blast, block with all to avoid debuff
- Energy Siphon - debuff on pets for Dia healing (30 mana = 3k healing), ignore or use your mana?
- use small attacks (1-2) on Dia between minions to build mana and save big attacks for minions
- 2nd round of minions - use same tactics as first round
- last round of minions - if you defeat Dia first, they can and will still kill your party unless defeated within 9 turns
Kowlla the Ancient: (pronounced cowl-luh)
- Triggered by Ancient Cave Creatures, 500k health, Wisps = 36k health.
- Use Training Ground bonus for Elites/Named
- When Kowlla summons her wisps, they appear first in the next turn before your attacks hit. So use attacks that hit all enemies on the Conjuring turn to get a head start on taking the wisps down. Turn order for these guys are: debuff actions, enemy attacks, pet attacks.
- After the first round of Wisps, you have ~30 more turns to take Kowlla out before she summons them again (seems to be around turn 40). Hopefully you can get 2 rounds of Decimate on her in that time. Keep attacking Kowlla, as you might not survive another round of Wisps. If you are strong enough to defeat the wisps, you should be strong enough to take Kowlla out before the Wisps reappear.
*Note: the wisps attacks are less strong now than at the beginning. I've updated to reflect this. Thanks Krin!
Written for Water Tank & 2 Air Cannon party:Full write up here
- 95-100 Mana = block with all to avoid infection and mana sap
- Water pet uses Shield (attack 4) when Kowlla approaches 80% health
- Conjuring = summons minions, use attack 3 on all pets when you see this
- Wisps appear = use Decimate: Cannon 1 attacks Wisp 1, Cannon 2 attacks Wisp 2
- Channeling by minions = very deadly to your party, keep attacking until gone
- Attack and beat Kowlla before she Conjures more wisps.
Written for Light Tank and 2 Air Cannon party:
- 95-100 Mana = block with all to avoid infection and mana sap
- Conjuring = summons minions, Light uses attack 2 and Airs use attack 3
- Wisps appear = use Decimate: Cannon 1 attacks Wisp 1, Cannon 2 attacks Wisp 2
- Channeling by minions = very deadly to your party, keep attacking until gone
- Attack and beat Kowlla before she Conjures more wisps.
Written for Light/Air/Fire party:
- 95-100 Mana = block with all to avoid infection and mana sap
- Conjuring = summons minions, Light uses attack 2, Air attack 3, Fire attack 4
- Wisps appear = Air uses Decimate on Wisp 1 (higher health wisp), others use Finishing Blows on Wisp 2
- Channeling by minions = very deadly to your party, keep attacking until gone
- Attack and beat Kowlla before she Conjures more wisps.
Anyone try double Fire parties?
Edited By Bunne on 4/27/2020 at 10:56 PM.
Bunne
Level 70
Fancy Pants
Joined: 8/2/2018
Threads: 40
Posts: 862
Posted: 8/6/2018 at 3:53 AM
Post #7
Top | Breeding | Viridian Meadows | Umbra Forest | Astryl's Vale | LG Enemies | Festivals
Festival Need to Know
There will always be an official Festival/Event thread that you will be pinged to in the forums. PLEASE READ the overview! I can't tell you how many people will ask the same questions over and over, when the answer is in the overview. Knowledge is power :)
There are several Festivals throughout the year. Major festivals are seasonally themed (Winter, Spring, Summer, and Fall festivals) and smaller festivals/events can happen during holidays (Valentine's Day, St. Patricks, etc). I've created a general overview of similar features available in all the major festivals for quick reference.
Festival Zone:
The major Festivals will have special Festival Zones where you can gather festival currency/items and Themed Pets! You will likely spend a lot of time here during festivals, so get comfy! Enemies in festival zones will match your party's highest level pet. So if your party is level 30, your enemies will be level 30.
**TIP: The difficulty level increases after level 60, which means it takes longer and more turns to defeat enemies. However, bosses above level 60 usually drop more loot than those under 60. Once you are able to, it may be a good idea to have 2 battle parties, one under and one over 60. Use the lower level to explore and switch to the higher level for boss battles.
Festival Zones typically have "hidden" areas that can be reached through false walls and objects. Some people like to discover these for themselves. But if you are like me, you want to know where everything is so you don't miss anything. Check out Tori's map thread, which contains links to all the map images: click here for the Map guide.
There are usually 6-7 Bosses (5 star enemies) or Elites (4 star enemies) in the festival zone. Once you beat one, it will reappear in around 6 hours in the same location (similar to the Lost Grove). Treasure chests and Nests can appear in as soon as an hour.
If you haven't reached the Lost Grove yet, here is a refresher on Themed Pets. How do you know a pet is themed? The name gives it away:
Wild Sylesti = non theme (Wild Luffox, Wild Lunemara, etc)
Named Sylesti = Themed! (Laughing Stream Luffox, Wandering Willow Lunemara, etc.)
Boss Minions = not catchable and usually have one word names like Gloom or Luna. They will not have the genus in the name (so no Ferrikki or Qitari in the name). They usually show up with their boss.
You will want to "run the map" and clear chests when they pop up. There is a small chance that when the chests respawn, there could be an egg nest in some of the spawn points. These nests are usually themed pets, and some pets may be really rare or hard to find.
There is usually a task that requires you to catch a certain number of pets to receive the Master Trap prize, usually 50 pets. You must capture 50 pets (pets that run or are defeated don't count), but nests that you adopt count towards task completion. You want to complete this if you can! Master Traps are the only traps that will catch a Legendary (yellow star) or Mythical (red star) pet. Some players use these to catch themed Ferrikkis or themed Nephinis in the festival zone, as these species can be rare and highly valued. As a general rule, any pet that is valued under 600k is probably not worth using a Master Trap to catch.
Finding Fabled Wild & Themed pets:
Festivals are the only time you can encounter Fabled wild and themed pets, except for a few that are available year round. There is a rotating schedule for the rest of the year:
Aeridini: Spring Festival Zone, Wild & Themed
Ferrikki: All Festival Zones, Lost Grove year round. Wild & Themed
Griffi: Winter Festival Zone, Wild & Themed
Lighira: Summer Festival Zone, Wild & Themed
Nephini: All Festival Zones, all Astryl's Vale year round. Wild & Themed
Ny'vene: Ethernia's shops in Astryl's Vale year round, Wild/Tamed only
Puffadore: Ethernia's shops in Astryl's Vale year round, Wild/Tamed only
Ryori: Fall Festival Zone, Wild & Themed
The Spring Festival in 2019 had a brand new feature: the Shared Garden. Activating the feature meant you could encounter any species at differing event times. Here is the overview for that event: click here and look for the "Shared Garden" section. This will likely become a recurring feature each year, we shall see!
Pet Creation Feature:
During each major festival, there will be a pet creation feature. They are called different things during different festivals. The functions are mostly the same (I've given them nicknames here):
Pet Blueprints: each pet that can be created will have a specific blueprint you will need to make the pet (for example: Arctic Glacier Griffi or Frozen Kindling Nephini will need their named blueprints)
Visible Gene Modifier: this will determine how many genes are visible or carried on your pet:
- Nothing added = 1 carry gene (no carry for majestics)
- Lesser added = 1 visible gene (1 carry for majestics)
- Greater added = 2 visible genes (1 visible for majestics)
- Exceptional added = 3 visible genes (2 visible for majestics)
Slot Selectors: Allows you to guarantee a Visible Trait in a specific slot of your choosing. You must have a Visible gene to use these, so use your gene modifiers first. You can use one of these for each visible gene you have, so 1 vis = 1 slot, 2 vis = 2 slots, 3 vis = 3 slots. Say you only want 1 specific trait, but want a 3 vis pet? Use one slot selector to get your guaranteed visible slot locked in, then the other 2 slots will be randomly assigned.
Hidden Gene Modifiers: Guarantees that a Visible Trait will have a Hidden Carried Trait. You can only use these once per visible trait. So if you are creating a 3-vis pet, you can use 3 of these.
Gender Modifier: allows you to make the pet male or female
Stats Booster: Boosts the Base Stats of a Pet by 100 Health and 5 Str, Int, Dex, and Agi. Can be used four times per pet.
Time Booster: Some festivals require the pets to be tended to or nurtured during the creation process. Time booster items will instantly finish your pet, or get rid of the waiting time between nurtures.
Majestic Blueprints:
These pets require a Majestic Blueprint and can be many different species, but are limited to 3-4 pets per festival. These will be listed first on the pet creation page and the name will usually be "Species: ???". The theme name won't be updated until at least one has been created/hatched.
All Majestics will only have Restricted Traits when created. You cannot add Hidden Traits to these guys, and you can only use slot selectors for slots that have Restricted traits available. For example, if you are creating a Twilight Deity Lighira, you will only get Ancestral Deity genes, and they are only visible in G3, M1, M2, and M3.
You will never get traits on G1 or G2 for this specific pet, because the restricted genes are not available in those slots. So you will never have a 6-visible Twilight Deity Lighira
Another example: The Skullmoth Ferrikki has the restricted traits in all 6 slots.
This means it is possible to make a 6-visible Skullmoth Ferrikki.
Fabled Blueprints:
Fabled species will always require Fabled Blueprints. These will be listed after the Majestics on the pet creation page. Fabled species are:
**TIP: For the Festival Task logs, there is usually a task that requires you to complete all pet creation tasks 0/25. This means you only need to create 1 pet of each species, plus 3 different majestics to complete this task. Most species have 2 different pets you can create: you only need to make one from each pair.
What happens if you don't finish the pet creation before the festival ends?
Once the Festival zone closes, the pet creation feature, Festival shop, and Task Log usually stay open for about 1-2 more weeks. If you don't finish creating pets by the last day, they will be lost (so don't let this happen to you!). Also note that any left over festival tokens or pet creation supplies will be removed prior to the start of the same festival next year.
Festival Differences:
Each festival has a little different process to create and finish pets.
Winter
- Pets are created immediately. Select the blueprint you want, and add all items you wish to use in the correct slots. Make sure you have everything you want added before you create, as you only get one chance! You can buy specific blueprints in the Snowman Exchange Shop if you are wanting a certain pet.
Spring
- Planted seeds will complete on their own in 144 hours (216 hours for majestics).
- Agents can be applied every 30-35 min, and will increase progression by 1 hour (or ~0.7%, which is why you might not see a % increase with each agent applied).
- There are 2 bonuses that can only be reached by adding agents. Adding agents will progress the bonus by 3-4%. First bonus = stats boost equal to using 2 Spectral Essences. 2nd bonus = adds a random carried trait (not a hidden) for regulars/fabled, or adds another stat boost to majestics equal to using another 2 spectral essences. These stat boosts are in addition to any spectral essences you use on the brew!
- Modifiers can be added any time before the plant is finished.
Summer
- Sculpts need to be tended to, they will not progress on their own. There are 3 different agents to apply: Water fixes cracked, sand fixes deformed, and sun fixes soaked. If you choose the wrong agent, you will get an error message, just try again with the right one.
- Agents can only be applied once every 60-65 min, unless you use a Quick Drying Agent, which removes the time limit completely.
- Each agent applied increases the brew progress 4% for regulars, 3% for fabled/majestic.
- Modifiers can be added anytime before the sculpt is finished.
Fall
- Brews left alone will complete themselves in about a week. Brews that are tended to every 30-60 min or so are finished in about 3 days.
- Adding agents will increase its progression and upgrade your brew from Normal to Good, then Great, then Perfect. Once you get a brew to a Perfect status, the bonus will start progressing. At this point, agents added to the brew will increase both the brew and bonus progression. If you wait too long between agents, your brew will drop down a level, until it reaches Normal again.
- There are bonuses that you can get by tending to your brews. First bonus = stats boost equal to using 2 Spectral Essences. 2nd bonus = adds a random carried trait (not a hidden) for regulars/fabled, or adds another stat boost to majestics equal to using another 2 spectral essences. These stat boosts are in addition to any spectral essences you use on the brew!
- Expedient Brew Agents: if you use these at the beginning of the brew and add agents immediately until the brew is done, you WILL get both bonuses on the brew. This is only a guarantee if used at the beginning of the brew. If used at a different time, it depends on your bonus progression vs time left on the brew.
- Modifiers can be added anytime before the brew is finished.
Here are the different names for these items according to the festival:
Bonus Games:
These are a great way to use your tokens (depending on the festival) and find lots of festival related items items (like blueprints, add ons, festival tokens, and exclusive avatar items). You can also get Greater Genetic Mutators, Prismatic Philters, Themed Trait Disruptors, and more!
Beach Seeking: (Summer Fest)
Use shovels on land and fishing poles in water to grab items (there are 25 of each). You can get a new beach/reset for free every 8 hours, or pay to get a new one anytime. You can seek every tile as long as you have enough shovels/poles.
Haunted House & Winter Wonderland: (Fall and Winter Fests)
- Entrance costs 1000 tokens, 500k gold, or 250 diamonds for each time you play.
- There are 3 stages, each with better prizes. You want to get to the 3rd stage if possible to get the "good stuff".
- You are not guaranteed to make it to the next level. You have only so many chances to find the "key" per level. If you don't find the key, you don't move on and that game is over.
- Covered spaces are squares that have objects on them. You must use 2 turns for these: one to remove the object, and another turn to reveal what is in that square. Covered spaces are said to have a higher chance for the best items. I ignore the covered squares on the first 2 levels so I have more chances to find the key. If I find the key right away, I may explore some of the covered squares, its up to you!
- Genie's Lamp is a special item you can find sometimes. You can only have one at a time, so use it when you can. I like to save these for the 3rd stage and use it to remove all objects. I then explore the newly uncovered spaces.
This is a new feature, in testing phases. So far, the stage bosses are similar to the LG ones:
Stage 1:
- 3 Sprites
Stage 2:
- Ancient Ent & 2 Sprites
Stage 3:
- Chuck Porous (Earth Construct) 120k health - block at 100 mana to avoid stun?
- Spruce Lee (Sprite) 100k health
- Steven Seagull (Aurl) 80k health
Stage 7:
- Kowlla 300k health
- Summoned Wisps x2, 30k health each
Stage 8:First win write up
- Grove Behemoth, 500k health: block with middle pet on last turn of "Recover", block with all on last turn of "Gather" (when at 100 mana)
- summons colored Plasmas x2, 20k health each: wait until their shields disappear, then kill quickly to keep Behemoth from healing?
Expertise Rewards:
- Rank 1 abilities: gain 1% for every 20 expertise
- Rank 2 abilities: gain 1% for every 40 expertise
- Rank 3 abilities: gain 1% for every 80 expertise
Edited By Bunne on 12/1/2019 at 12:37 AM.
Bunne
Level 70
Fancy Pants
Joined: 8/2/2018
Threads: 40
Posts: 862
Posted: 8/6/2018 at 3:53 AM
Post #8
Top | Breeding | Viridian Meadows | Umbra Forest | Astryl's Vale | LG Enemies | Festivals
Behemoth:
0/25/50/75% recover 1 left: block with tank
100% recover 2 left: taunt with tank
100% recover 1 left: block with tank
After first max mana attack:
0% recover 1 left: block with all next 2 turns
Turn 47: Vicious vines, block with all for 2 turns
Turn 77: Vicious vines, block with all for 2 turns
Edited By Bunne on 4/11/2020 at 8:21 PM.
Bunne
Level 70
Fancy Pants
Joined: 8/2/2018
Threads: 40
Posts: 862
Posted: 9/16/2018 at 5:32 PM
Post #9
Top | Breeding | Viridian Meadows | Umbra Forest | Astryl's Vale | LG Enemies | Festivals
Lost Grove Crash Course to the Caves
Modified LG Caves Map to show Boss/Elites and Nest Spawns: click here
Grove Walkthrough, very detailed: here
LG enemies guide: here
When you finish a stage, you might have to wait around 5 min, then refresh the page. It updates every 5 min or so, keep that in mind.
Stage 1:
Need to gather and turn in :
Ancient Timber x ~ 10
Enchanted Cloth x ~ 13 or 14
Tempered Steel x ~ 6 or 7
Spritely Branch x ~ 200 from Forest Spritelings
Reclaimed Supplies x ~ 88